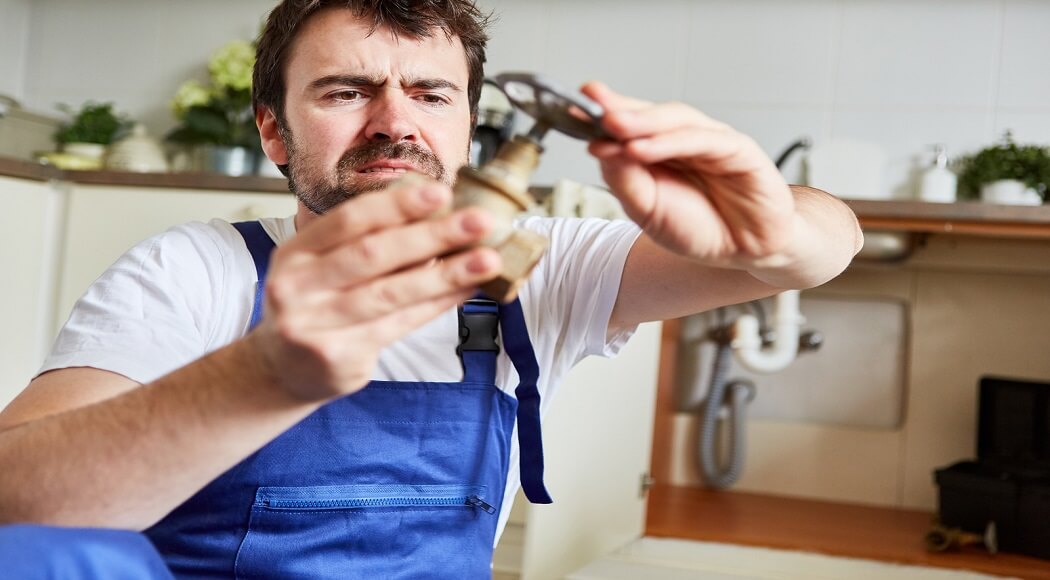
The rubber washers on the toilet’s shut-off valve will only be used sometimes. The slightest rotation is all it takes to open a leak in the valve. Frustratingly, a broken toilet is frequently the first visible sign of a problem that needs fixing or replace toilet shut off valve. The valve cam is changed without calling a plumber.
What do You Need to Know Before You Get Started?
Before beginning to replace toilet shut off valve, it is essential to determine what kind of plumbing you have.
- Iron pipes are common in houses constructed before 1980. An ancient shut-off valve may be a headache to remove from corroded iron pipes, turning a simple repair job into a major hassle. If you have ancient cast iron plumbing, it’s better to have a specialist take care of it.
- In addition, copper pipes might be present. Sweating refers to the soldering of a copper pipe to a toilet shut-off valve replacement using a blowtorch. Those who like to tackle projects alone need not worry about this. Instead of using dangerous open flames or flammable gas, a sweated copper joint may be quickly severed and replaced with a compression connection. However, a licensed plumber should be consulted to avoid “sweating” the new joint.
Finally, remember that replacing toilet shut-off valve is one of those plumbing chores that will leave your house without running water while you work on it. Before beginning the repair, ensure that you have all the necessary materials to have the restrooms back in operation as soon as possible. You’ll earn the gratitude of your loved ones in the long run.
1. Take Away the Outdated Valve
The current valve’s installation method determines the connection you’ll utilize next. Potential examples of this are:
Valves for Compression
It uses a compression nut with a hexagonal shape to keep it in place. The valve body may include two flats on the side or a pair of hex flats at the compression nut. Using pliers, remove the pipe from the bolt. The old valve’s compression ring and nut may be thrown away once removed from the pipe.
Sweat Restricting Valve
You’ll need to use a tube cutter to sever the connection between the new and replace shut off valve for toilet and the copper line that supplies water from the old valve. Turning the pipe cutter’s nut to a tighter setting will help it cut through the metal pipe more smoothly. The length of the pipe protruding from the wall should be sufficient for mounting the new component.
Connecting Rod
Threaded fittings are identified by threads and flex caps at the point where the metal pipe and valve meet. A pipe can be made of copper or galvanized metal. When it has to be replaced, use another threaded valve.
2. Arrange for the Installation
When cleaning the exposed tubing, use an emery cloth. When switching from a sweat valve to a compression valve, it is necessary to sand off any remaining solder before installing the new outer sheath, nut, and sleeve.
It is required to remove some of the solders from the pipe to allow the new sweat valve to be fitted onto the pipe. Soldering a new quarter-turn valve requires detaching the stem and wire, brushing the surface, then applying flux and heating the valves until the solder is pulled in. With a moist towel, remove any melted solder pooling on the surface.
Use a wire brush to remove the seal tape from the threads of a threaded-style valve before installing it. Re-seal them with thread seal tape, but this time use fresh tape. You also have the option of making use of a pipe thread compound. It is recommended that the pipe be sanded down using a sanding cloth before installing a push-to-connect valve.
3. How to Replace Toilet Shut Off Valve?

Compression Type Valve
Remove any burrs from the copper pipe using a deburring tool, which is not required for PVC pipe. Next, insert the pipe into the compression nut with the threads pointing away.
Slide the new valve as far as it will go over the pipe, ensuring that the outlet points upward before you squeeze the compressive ring onto the tube. As you use one crescent wrench to keep the valve body in place while you tighten the nut with the other, you can be sure that the compression nut is securely fastened to the input of the valve.
Plug and Socket Valve
After the valve has been secured to the pipe, turn it to move the flux around. Put the valve in the open position to stop the inner washer from melting. As the flux begins to bubble, heat the fittings with a propane torch and solder the junction, using half an inch of lead for every half an inch of the tube diameter. The excess solder should be removed from the intersection utilizing a dry cloth before it hardens.
Toggle Valve with a Threaded Body
Secure the valve to the pipe using your hands. First, hold the pipe in place with a pipe wrench, then use an adjustable wrench to snug up the valve. Do not overtighten the valve since this may cause it to break.
Quick Connect Valve
The replace toilet shut off valve onto the pipe should be even and square. Keep going down until the gate bottom out, and then give it a little tug to ensure it’s secured. Then, the mechanism within will create an impenetrable seal. As long as enough tubing protrudes from the wall, a quarter-turn push-fit ball-style valve may be utilized instead of sweat and compression fittings for a tool-free alternative.
4. Resurrect the Water Service
Once you’ve reconnected the water lines and turned on the main water valve, you’re all set. Loosen the toilet’s shut-off valve by turning it anticlockwise.
While the tank fills with water, look for leaks in the area where the replacement valve was installed. If this is the case, the water supply must be turned off, the lines must be drained, and the compression nut on the valve must be removed. The connection should be rechecked after the plumber’s tape or putty has been applied to the valve’s threads.
FAQs on How to Replace Toilet Shut Off Valve
What are the Different Types of Shut Off Valves?
Two primary types of shut-off valves for water systems are gate valves and rolling valves.
How much does it Cost to Replace a Shut-Off Valve on a Toilet?
You should expect to pay plumber cost to replace toilet shut off valve is $75-$200 to install a new flush valve, and up to $400 is what you should budget to have a continually running toilet fixed. The price includes the plumber’s labor and materials to fix the toilet.
How often should you Replace Toilet Shut-Off Valve?
A shut-off valve’s average lifespan of 20 years for a shut-off valve ranges from 10 to 25 years. However, if you don’t “exercise” them once each year or two, a valve may freeze open before it’s needed to shut during a plumbing problem or repair.
Can I Replace a Toilet Shut Off Valve Myself?
A seemingly simple repair job might turn into a DIY disaster if the iron pipes are corroded, and the old shut-off valve is being removed. That’s why it’s recommended to have a specialist involved if you have ancient cast iron pipes.
How long does it take to Replace a Shut-Off Valve?
If the valve can be reached quickly, the repair will take at least two hours. However, it may take many hours if cabinets or other obstructions hide the valve; the barriers must be removed, and then the valve may be replaced.
What Size Shut-Off Valve for a Toilet?
The flush valve of a toilet is usually the same from one model to the next. Whenever the flush handle is depressed, water is released via a 2-inch flapper valve.
What is the Most Reliable Water Shut-Off Valve?
In many cases, ball valves are utilized as the primary water shut offs since they are thought to be the most dependable. Ball valves, like gate valves, may either be fully opened to enable complete water flow or fully closed to prevent any water flow.
How do you Fix a Leaky Shut-Off Valve?
Use an adjustable wrench to loosen the bonnet nut to fix a leaking shutoff valve. The threaded spindle of the valve may be accessed by pulling back the nut. Cover the spindle with Teflon packing and reinstall the bonnet nut, turning it by hand. Using the wrench, snug the nut down securely, but not too much.
Replace Toilet Shut Off Valve: Conclusion
Most homeowners can fix a dripping toilet by replacing the valve, which only takes a few hours. If you follow these procedures, you should be able to replace toilet shut off valve in your bathroom without any problems, fixing the leak and restoring regular operation.
Even though this is a do-it-yourself job that most people can do successfully, it’s important not to overestimate your abilities. For example, iron pipes that have rusted over time may be a nightmare for any do-it-yourself plumber. DIY-friendly plumbing projects include fixing newer materials like PVC and copper while contacting a plumber is necessary for older systems.
Read Also:
Guide to Toilet Fill Valve Cleaning
How to Fix a Toilet That Won’t Flush
How to Install a Bidet Toilet Seat